Interior designer Kelee Katillac provides step-by-step instructions for creating a heavenly view in your home.
What You Need
| Roller | 1-inch brush for outlining |
| Antique White latex flat paint (Sherwin Williams #6119) |
Quench Blue latex satin paint (Sherwin Williams #6785) |
| Non-permanent marker | 4-inch or 5-inch brush for general painting |
| Tracing paper | Krylon flat white spray paint |
| Craft paper | Celestial Blue latex satin paint (Sherwin Williams #6808) |
| Scissors | |
| Blue painter’s tape | Paper towel |
How to Do It
|
Using the Antique white paint, apply a base coat to the ceiling with a roller. Let dry for three hours minimum, till non-tacky to touch. |
|

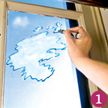
1. Look for interesting cloud formations then trace clouds on windowpane using a non-permanent marker. Overlay tracing paper and make a stencil. |
|

2. Cut stencil out of craft paper. Tape stencil to ceiling with blue tape. With 1-inch brush, use the Quench blue paint to follow stencil outline on ceiling. |
|

3. Or freehand cloud shape using 4-inch or 5-inch brush. Also use Quench blue to fill in sky between cloud shapes. |
|

4. Spray paint puffs of white into clouds to create billows using Krylon spray paint. |
|

5. To give depth, use 3 parts Celestial blue paint to 1 part water. Dip wet paper towel into glaze then dab on clouds to define them. |
|
Don’t miss Kelee’s inspiring story about what moved her to re-create a beautiful blue sky on the ceiling of her workshop.


